Backup your drive : Tutorial
 Backing up your hard drive is always advised. A good software that does the trick is Drive Backup from Paragon.
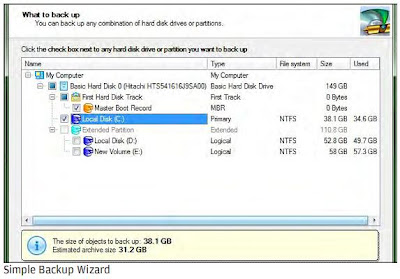
After you install and register the installation, restart your system. As a word of caution, if you have large volumes of critical data, you should back it up in phases rather than copying all your data at once. Check your operating system for any infections or malware. Click on Back up Disk or Partition to get started. Select the Master Boot Record (MBR) and the main drive (C: for most users).
 Check for two important figures - the size of source, and, the destination location. Ensure there is sufficient space to store the image of the data.
The next view asks you to select where you want to store your image file – the backup destination page. You may also store the image on the drive you are backing up. The program excludes that location from the backup location in order to avoid ending up in an infinite recurrence. While recovering the image, you should select a different destination location. You cannot recover the drive from itself. It can also be stored on computers that are available on connected networks.
The whole backup process takes time depending on the size of the image. Once it’s done, click Finish. Click on Check Archive Integrity. Select any of the listed archives, click next. This could take some time depending on the size of the archive.
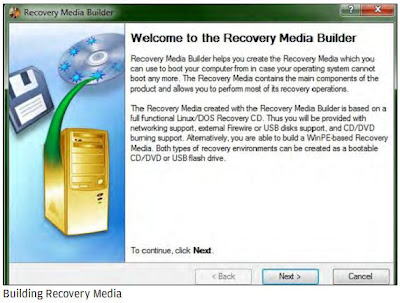
Before you restore your drive, you must specify your recovery media. If you plan to restructure your operating system, you need to reboot from somewhere. On the first screen, click on Build Recovery Media.
 You can build and store the recovery media either on Flash memory (Pen-drive) or on a CD/DVD option; boot from USB is the most convenient. Choose your option, click next. The first option is Typical. Use this if you want to accept the default recovery package and start burning the disk. It will build a Linux-based boot disk with a minimal set of tools for restoring your image. Advanced is available only on CD/DVD. It allows you to add extra files and folders (assuming you have space). Click Next and soon your recovery disk / pen drive will be ready for use.
Coming to the restoration part, reboot your system with the disk or USB drive in place after setting the appropriate boot sequence from the BIOS settings.
 Launch the Simple Restore Wizard by double clicking on it. Browse to the image you’d made earlier. The next window allows you to examine the properties of your image, such as size and available free space. Click next. Now, choose the disk you’d like to restore. The last page of the recovery wizard will give you an option to review all your proposed changes before it starts destroying data. Click next to begin the restoration process. Hopefully, if everything has gone on well, the progress bar will eventually reach its end, and you can click finish. Exit the Wizard and restart your system. If you have followed the correct procedure, your current system will be replaced with a pristine version that you backed up.


 TechQuark is a mobile-friendly website. Simply bookmark